Showing posts with label Minis & Terrain. Show all posts

Monday, March 14, 2022

Foam Terrain Building

 The pandemic has resulted in 2+ solid years of terrain building (mostly) with foam.

I thought this would be a good place to collect my thoughts about the expereince.


Things I wish I knew/had from the start.

  • A small chisel or similar tool like for clay or delicate woodwork
    • While I have plenty with a combination of utility and other knives, having a few good tools to cut fine gouges out of material would have saved a lot of time.
  • Matte Mod Podge
    •  I make use of a base coat of black paint and Mod Podge (popularized by Black Magic Craft) I found I much prefer the results using the slightly more expensive matte as opposed to the standard finish I bought initially
  • Rough Sand Paper and woodblock
    • I came across these as a solution to some of the "skin" issues I discuss below (though not a total solution) and rough sandpaper used in one direction is a hand way to put "woodgrain" into foam.

Poster Board Foam

This is probably the material that is easiest to get and has the lowest initial entry cost.  Most folks say to use "dollar store" foam board.  I can't speak to that, but I can say "standard" foam board can be damn near impossible to peel.

I happened to get my supply free from work, there are often events with printed poster boards. I don't know if it is the printing process, or the printers also buy the cheap stuff, but it peels great.

In practice, I find that while it is a usable material for crafting, it is best for things with a cobble texture.  It is hard to describe, but the foam sheets have  a sort of "skin" on them that makes for good rounded stone, etc.  To get good brick, stone block, or wood/beams you really need to get in there and cut it (and or sand it).  Even then the difference in texture between the "skins" and the interior is often noticeable on the finished project.

Construction Foam

Sold in all different sizes and "colors" in the Unites States, I have access to 3 sorts. "Pink", "Green", and "Blue".  All of these ended up sourced from a nearby construction project.  Since these were off-cuts, I do not have the specs for each substance.  However, even these few off-cuts allowed me to craft a bunch of stuff.

"Pink" is my favorite.  The "Blue" is a bit too soft, and the "Green" has a noticeable inner structure that often shows in the finished product.  "Pink" just has a nice interior structure and firmness that takes carving and decoration well.  (Though I am envious of the foam they have in Europe and the UK.  The white-ish European foam seems to have a firmer structure that takes sculpting very well, and they seem to have grey stuff in the UK that would save sooo much time in decoration phase vs the neon/pastel options we have here.

Tools

I got a proxxon hot wire table (as a gift) about a year into things.  I always found its $100- 120 price tag just high enough of a cost to question if it is needed.  It would be one more thing to store, and why not just spend that money of terrain?

At the start i was happy to make do and got a lot done with just some utility knives and an old kitchen knife.  With a nice metal ruler, you can make good cuts in foam board, and after making a rough cut with construction foam, you can use the kitchen knife to slice it down to the proportions you need.

That said, the wire cutter did make some tasks quicker and easier, such as making bricks and cuts in general.  There are a few projects that were, if not impossible without the proxxon, would have been impractical; things like curved cut walls and long thin sections of material (to replace foam board).

Tacky Glue! This is the happy medium between hot glue (which may melt foam, and requires quick work) and white glue, that takes forever.  The tacky glue gives you some freedom, but cures up (at least well enough) to let you keep working quickly.

Mixed Media: Sounds silly to say, but you don't have to do everything in foam.


Resources

The Bards Craft

DMG Info

Black Magic Craft

RP Archive 

Wyloch's Armory

Edit:  Special shout out to the Terraino guy.  Not a system I would use (since I am already heavily invested in Dwarven Forge) but you can't fault the amount of thought he has put into the system.

Friday, June 18, 2021

Star Wars: Tokens

 I like to use miniatures for RPGs.  They are handy for keeping a clear idea of where characters are, particularly in some systems.  They also give something tactile for the player's to engage with.  For fantasy games I have had years to build up a collection to cover most situations.  However for sci-fi games, there are less options in general and they tend to be more expensive.  Also, while fantasy has collapsed into a general aesthetic, sci-fi has lost of different looks (space marines, flash gordon, etc.).  The issue is even further compounded for my Star Wars games.  Since the look is so closely tied to licensed works, it adds to cost and availability (especially when existing options are tied to a collectible game)

So, I opted to make paper tokens.  This is something I had done before, so I had supplies on hand.

-I opted to swap out all the minis from the Castle Ravenloft board game to tokens so I could keep the minis with my D&D supplies and leave the game playable, but that is another discussion

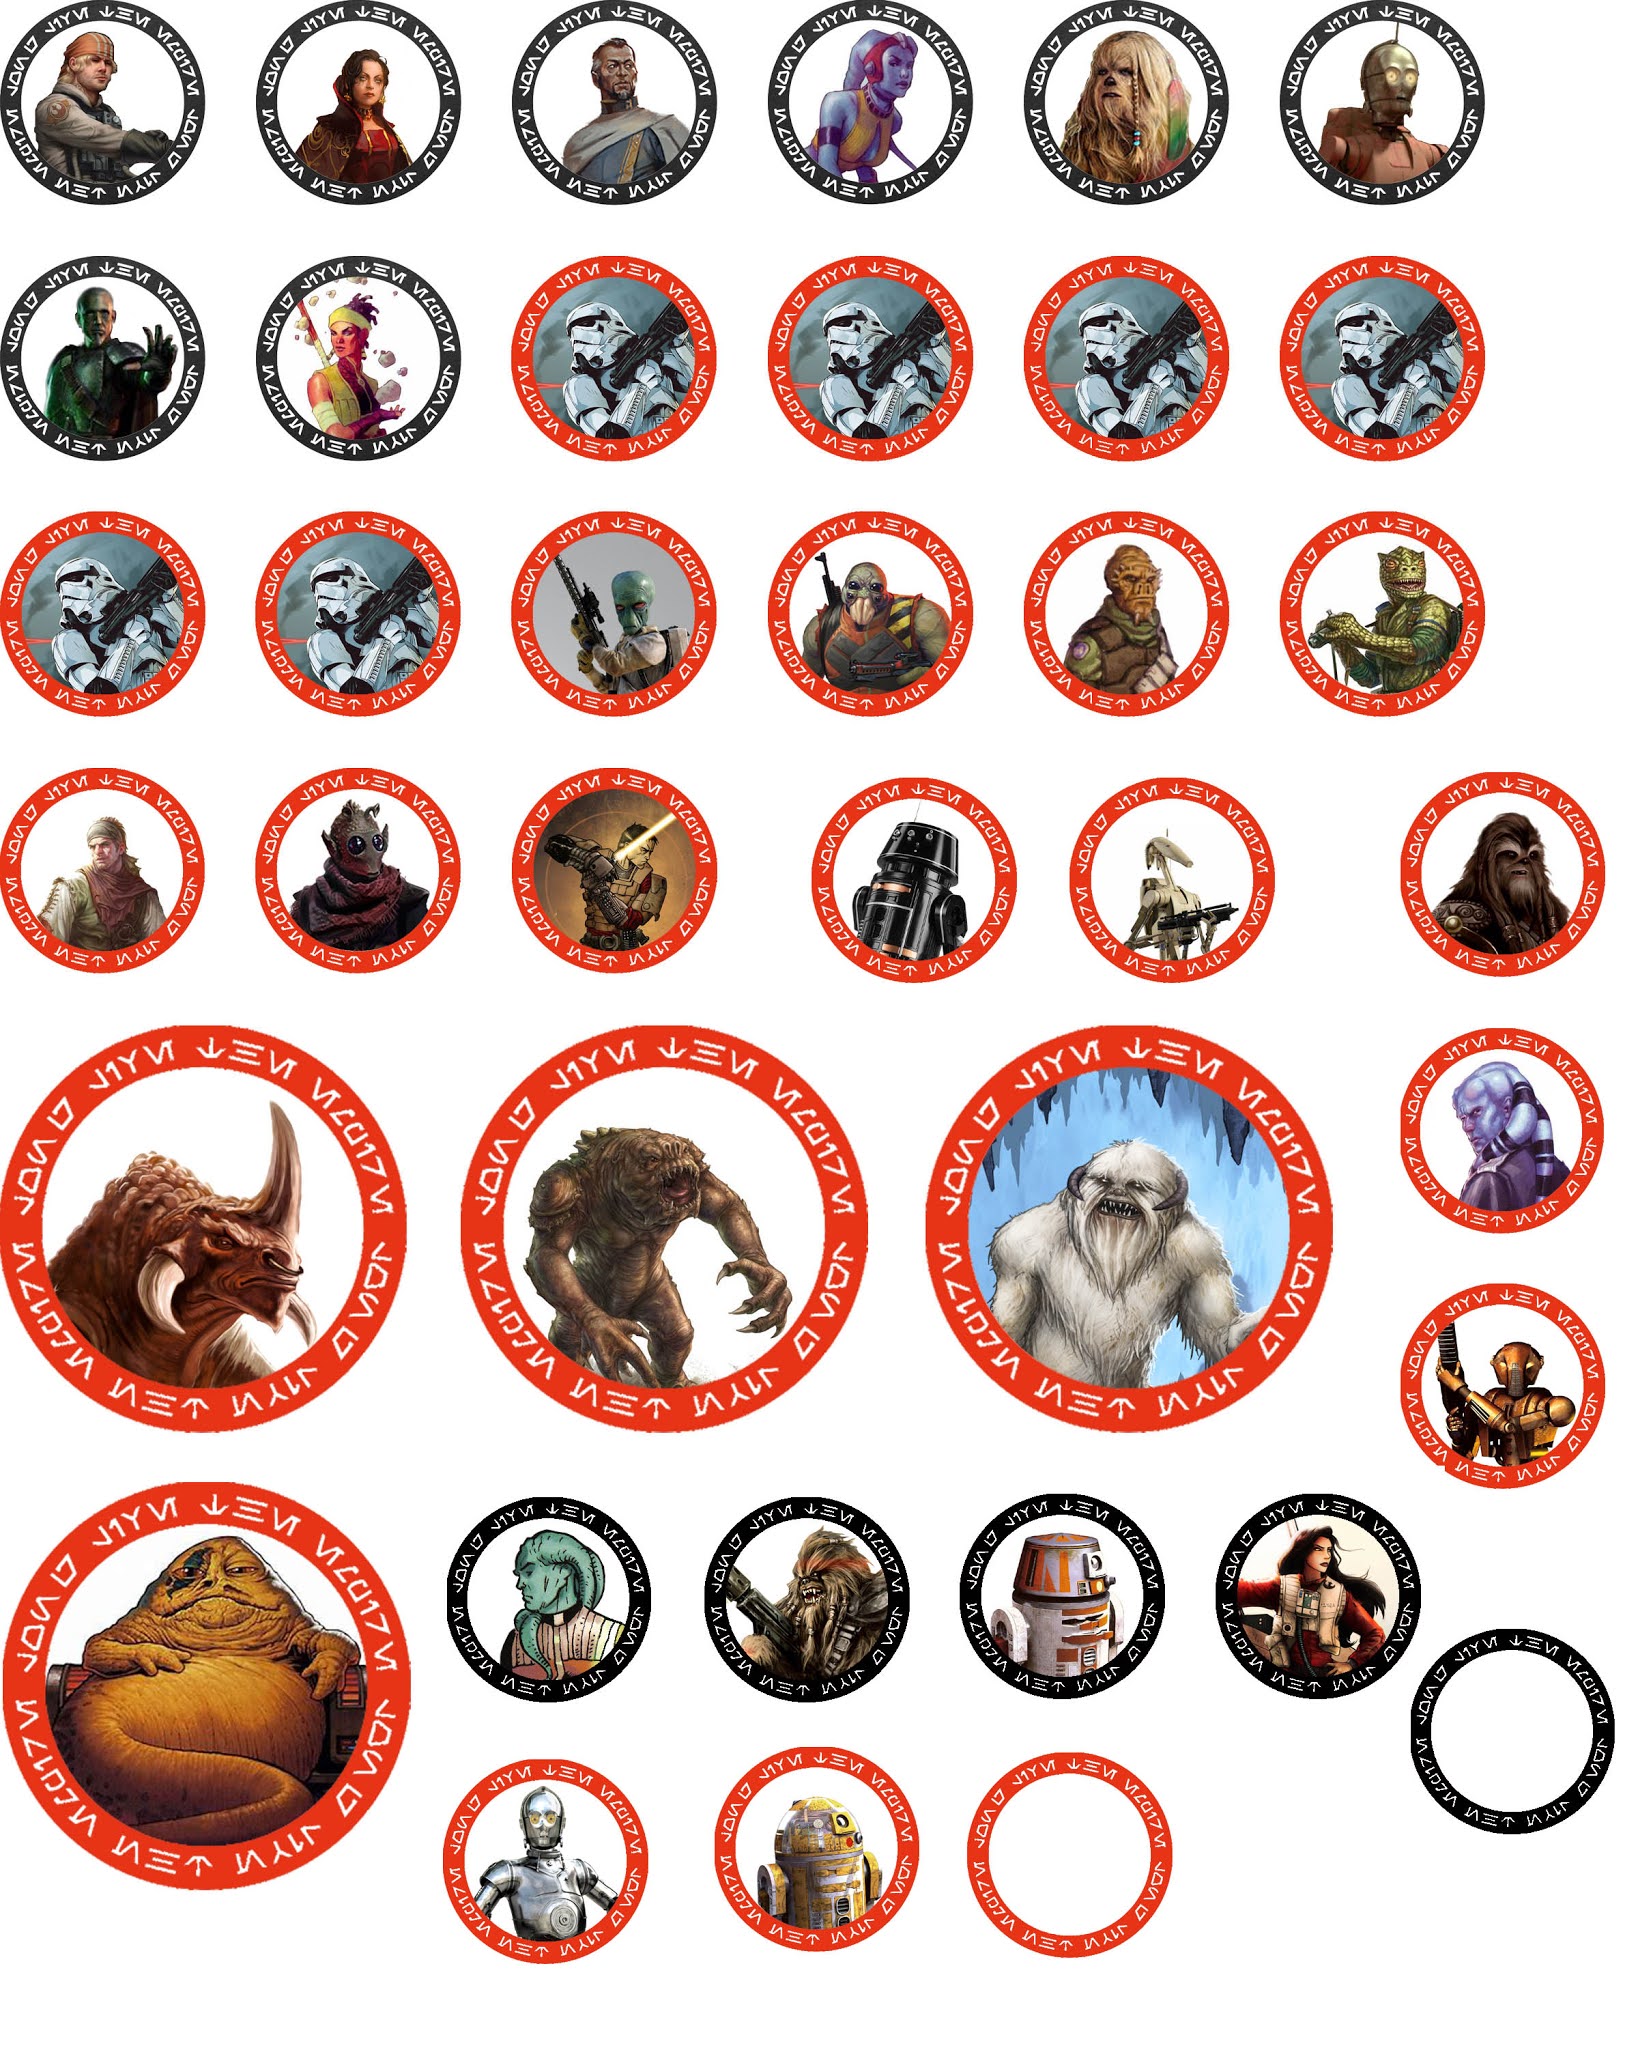
The art for the tokens was easily obtained with an internet search, though some species/class combinations are trickier than others (looking at you Female Wookie Jedi).  A quick trip to photoshop, and the color printer game me nice token art on come cover stock paper.  I use cover stock because it will stand up to the glue better.

To give the tokens some heft, I put them on card stock.  The card stock came from a large stack of advertising cards that were piled up with the junk mail in the lobby of my building.

I use a 1 inch circle punch from the craft store (50% coupon) and cut out piles and piles of circles, as well as the printed art.  A dot of glue on 3 circles, and a little wiggle, and let dry.  Once dry a glue stick or small dab of glue puts the art on the token.  One time I used printer paper with adhesive built in, but found it did not hold the printer ink well and led to scuffing/chipping.  

Once once you get the process down, you can have a ton of tokens in no time:

Here is a sample of the final product.  Not show are ship token (done in the same size ranges as characters) and the backs which carry generic faction logos to cover creatures/ships that I don't have representations for.


Friday, October 16, 2020

Terrain

 When I first started in the hobby, our DM used a sheet of clear plastic laid over a posterboard with a grid drawn on it.  He would use dry erase marker to lay out a dungeon location, and we have markers to draw in ongoing spell effect.  We would often have a player's map set out before us of the overall location (frequently provided by the module itself, this was the era of poster map inserts).  That worked for many years, figuring out how to position minis and spell areas for maximum effect was an enjoyable tactile and tactical part of the game.

When my time came to run my own games, I did not have a source for nice big sheets of plastic.  I ended up with the idea of carving the grid direct into a whiteboard.  It was tedious to set up, and there were a few stray lines bit it worked great at the table.  The downside was being a lot more difficult to transport.  

Other than the occasional bit of HeroQuest or Dark World furniture, we never really used terrain.  I had made a small diorama on a shelf as a way to display commonly used minis, but that was it.  I used to covet the Dwarven Forge adds in Dragon magazine, but dismissed it as being too much of a luxury item (never mind how mch I had spent on minis, dice, and books for the hobby).

However, when they did their first Kickstarter for the new "dwarvenite" material, I was on board.  The price was good, the piece count was good, and I was in a place financially where I could easily justify it.  The Dungeons and Caverns were perfect for at the table. They were highly modular, and you got enough bits in a base set to make what you needed.

City and Castles where a different story in my opinion.  While they were still "modular", they were designed in a way that gave you less options.  Due both to the layout options and the number of bits you got in an affordable base set. You could build one house and swap a roof or wall, and one tower, swapping a wall section.  Don't get me wrong, the price per piece offered was still reasonable, you just could not do as much with it.  There were still some good introductory sets and add ons that were useful and I invested in.

Their next set of Caverns and Dungeons were good, and had a $10 buy in so you could just get small bits, and since it was compatible, there was still use to be had.  However, now with the latest Lava and Woodlands its gotten too niche, too expensive for what you get/ I can use.  Personally I would love if they would jsut put out a dwarvenite version of their classic tudor style building tiles. 

This has turn less into a discussion of Terrain and more a referrendum on Dwarvenforge.  I still think they are a great company and am pleased with everything I have gotten from them.   Perhaps because gaming has moved all online and I just don't have much use for terrain right now.  Though I have made use of the time to craft plenty.  A topic to revisit later.


Wednesday, September 23, 2020

Mini Painting

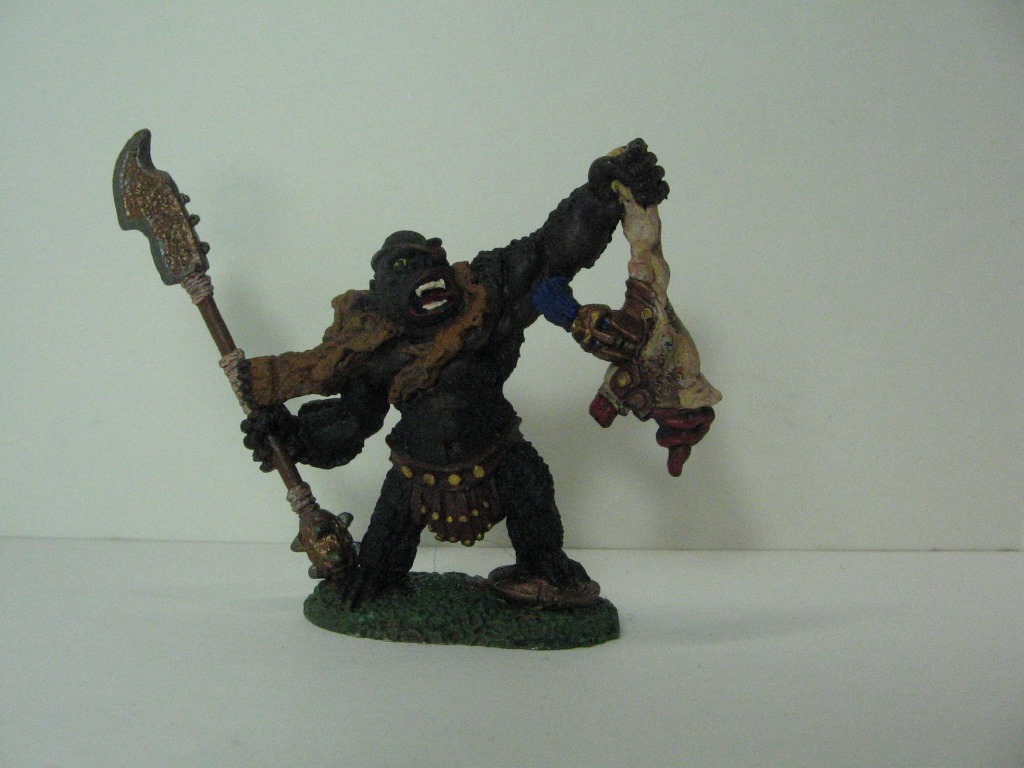
 My first mini painting set was a free starter set that came with some Ral Partha minis I had orders (by mail catalog).  Prior to that I would never have considered even trying to paint minis. I didn't want to ruin my prized DragonLance and Draconian sets, so I hit the bargain bin at my local hobby shop and grabbed some Shadowrun minis to practice on first.  This also got me started on modding minis (something I prefer not to do often), trying to turn sub machine guns into something resembling a crossbow.  I still have those minis, they look alright.

At this point I was all in on the detailed painting of minis.  I got decent spread of citadel colors from the hobby shop and set about the task for the next few years.  (I still have some, those 90's citadel bottles were way better at preserving paint)  Again, those minis are crudely done, but still presentable next to more recently painted items.

Then the great hiatus.  My several year break in gaming also resulted in several years away from painting.  I briefly got back into it on and off, but found my paint drying out and getting frustrated (citadel had switched to screw on tops).

I finally started up again about 8 years ago, but this time I was determiner not to drop a fortune in mini paints.  TO THE CRAFT STORE!  Ever since then I have done the majority of painting with standard $1 craft paints (and those 25 year old citadel colors).  They have worked wonderfully.  I had to go back and pick up some silver and gunmetal metallics, as I have not found craft ones that hold up.  Oddly brass, gold, and other "yellow" metals are fine in craft paint.  Also I need to pick up some specialized "flesh" tones (another area craft paints seem to be lacking).

But, even if you are a serious painter, I would encourage you to pick up some primary colors, grey, browns, greens, and black to help fill in the gaps and give you more variety of colors on the cheap.

Now I just need to get better at photographing:


Monday, September 14, 2020

Miniatures

Reapercon has come and gone and it got me thinking about miniatures (plus the non-stop painting for the past year and a half since my Bones Kickstarter arrived)

I enjoy mini's for their own sake.  Before D&D I was into model trains and towns (not that I could afford any besides what went under the tree).  Legos too.  So even if not for RPGs I would likely have spent a good chunk of my free time painting tiny people and buildings.

My first D&D games used a mix of the DMs HeroQuest, Ral Partha, and Grenadier minis.  When I brought my Dark World minis, the collection nearly doubled.  Minis seemed a natural thing, after all, it is a game and games have pieces.  It was a year or two later playing with a different group that I was introduced to "theater of the mind".

So in short, I like minis.  I like painting them as a hobby, and I use them frequently in RPGs (current state of the world and no in-person D&D not withstanding).

I do wish that early D&D had settled on a 1' = 1yard (or meter) scale.  It would have given us army men sized minis which I think would have opened up a bigger world to mini sculpts earlier on.  It also would have made map scales make more sense where the markers for doors/windows are concerned, but that is a different discussion.

So that said, I don't mind the overall trend to larger minis.  Though, it is weird having some Halfling/Dwarf minis that are burlier than my classic barbarians.  I appreciate having more room to work with paint.  Somewhat in-congruently, I am less of a fan of they overly detailed minis that are coming out in recent years.  They gave me bigger minis that are easier to paint, but then crammed them full of tiny details!!!  Also, I feel the details and bits, makes it less and less likely that the minis is a "fit" for your character.  But I guess if you want that level of compatibility, you go to Heroforge

Bones are great, and I have great luck repainting old D&D Miniatures in addition to those ancient board game dudes.  But I still think metal is better.  Maybe because it is what I learned with, I find painting to be easier.  I enjoy the literal flexibility.  So whenever I can, I try to pick up things from my wishlist on the Reaper metal catalogue,  especially if it is something unlikely to be made into Bones.  (I may prefer metal, but my wallet prefers plastic)

That said, I wish Reaper has a Sort by Sculptor function.

And lest I give all the love to one company, I highly recommend https://www.darkswordminiatures.com/  they have some great quality sculpts that have a very different aesthetic than traditional D&D style minis.